Powered by Blogger.

Followers

My Timeline

Showing posts with label diy. Show all posts

Friday, July 26, 2013

In the land of Pinterest everything seems so perfect and makes you want to make new things and paint old things... and for some people work out, but I try to stay away from that stuff. So when I came across this little gem I knew I could redo it with some good old fashioned spray paint! 


I love spray paint and I have tried a lot of spray paint brands, but I find Rustoleum to be my favorite. So I stopped by the Home Depot after I picked this baby up and bought Rustoleum paint in LAGOON!


I love the color, but I wanted something more than blue, I WANTED CHEVRON!!! Then I decided I wasn't going to be able to do a straight chevron so I decided, I WANTED HERRINGBONE!!! SOOO I painted it grey...


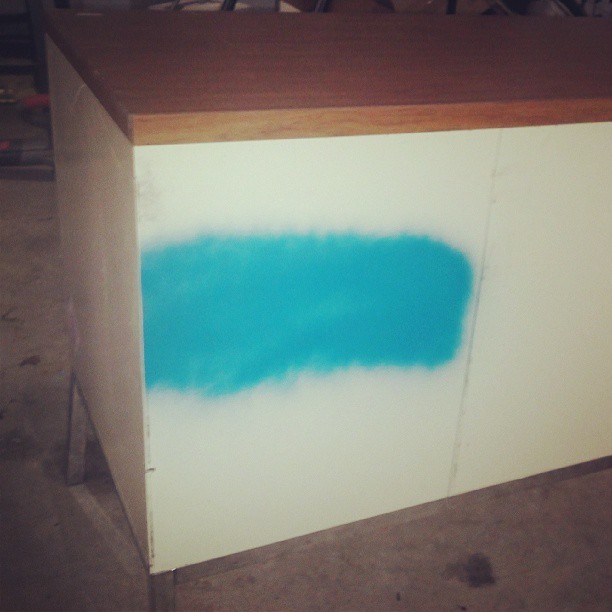
Then I was all, grey is boring... I'll make the sides Lagoon! 


So I tried to figure out the best way to make a herringbone pattern and I started with some stripes. I knew there was no way I'd make them perfectly straight, but kind of straight is good enough for me.


I was excited at this point, mainly because it was the day before my birthday and I was hoping to finish it as a present to myself. That of course did not happen! I started on the herringbone deciding I'd make the triangles get smaller and smaller as they went towards the bottom. I even put some magnets on the back of my ruler so I would stop losing it on the ground and top of the cabinet. I was being so productive and taking my time!


And then it happened, after hours and hours of work on it... I pulled off the tape.
DUN DUN DUN!!!!!!


I HATE IT!!!

It makes me sad just looking at the craziness and the ... I don't know I just don't like it. So after a day of being mad at it for being stupid, I hand sanded it so I wouldn't show my horrible herringbone through my paint. Then I did what I should have done in the first place, I painted it all LAGOON. I still love the name of the color.


This was actually my first coat and I have put another on it, but I needed to look at it and see what I could use to make it better. It's not done yet but I plan of replacing the legs since they are bent from someone pushing the heavy beast around and making a stencil to add a little something to it... 


Not sure what... 

Saturday, July 20, 2013

I have been slowly adding pieces to Mason's room over the last year, but there was one thing in his room that was driving me absolutely insane, his dresser! I had done that thing were I needed storage in his room and I needed it now, so I bought crappy new cheap furniture. I went to target and picked up the Room Essentials Dresser in White and started to put it together. I broke a piece in an hour, then couldn't get the back on, then it sagged in the middle. It was sad and doesn't store as many clothes as I hoped. The kids also try to climb the drawers and well... the plastic bottoms popped out :(


So I went to my best friend, Craigslist. I had found a couple things I liked, but then they would be gone before I had a chance to get them. It seems the Birmingham area is full of handy/crafty people because all the good stuff is gone within hours.  So when I came upon two vintage dressers for 100 bucks, I was sure they were gone. So I nervously emailed and then, they were available! The lady was so nice and I picked them up the next week at her yard sale. Mason was incredibly excited about the purchase and posed with his new dressers.


I'm sure when I showed all my friends they thought I was insane and at points I thought I was going a little crazy. I had decided I wanted ORANGE! The brightest orange I could get with crisp white! SO I started by stripping the varnish... it looked like a whole lot of snot all over the place. 


Then I sanded what was left smooth. The varnish was dry and a little chippy so I ended going down to mostly wood so the paint would stick right. Then with a primer and a brush I got stared. If I could go back I'd use a foam roller! I started with a roller half way through and it took so little time. 

ALSO! Sand the primer drips and rough spots before adding a different color of paint! While sanding some of the orange I would sand down to white and realize it was a missed primer drip.

My helpers were out and about in the sun playing and trying to mess up my orange as much as they could.  I used Valspar Paint and Primer in Autumn Blaze. When I posted this picture on Facebook, I was sure the orange shocked everyone.

I was overly excited about the project that even while I was stuck inside while the girls napped, I thought about the dressers. The view from the upstairs, looking down on my project area.


My biggest hurdle while doing the projects is Alaya. Mason and Shila keep busy with chalk and slides, but Alaya has to be contained and that doesn't work for her.  


But after a couple days of paint coats and poly to protect it from my children, I was finished, and so happy! The knobs that came with it even worked great!
So what do you think? Amazing right? I think so!


And I promise to stop using my phone to take all my pictures, but these projects are a couple months old and it's all I had at the time. Instagram has ruined me!

Thursday, July 18, 2013

My living room is depressing and sad. My dad thinks it is perfect with it's old paneling but he doesn't spend most of his relaxing time in the dungeon. 


So I finally gave in and started to paint the living room, surrounded by 3 kids and a little help from my 14 year old niece. I started with trim and made it sparkling white, well after about 3 coats.


It was crazy how much of a difference just he trim made, so I was so excited about painting the rest. Not to mention, I got lucky... like really lucky! I found 2 gallons of Valspar Gravity paint at Lowe's in the oops paint section! I snatched those suckers ups so quick! 

I had no idea how long it was going to take to paint the paneling. Just to give you a description, it was fuzzy. You could feel the wood and it had a fuzzy/splintery texture. I also had to use a brush to paint all the knots and the very deep lines between the boards. I was still cooking dinner, getting kids to take naps, and referring fights.


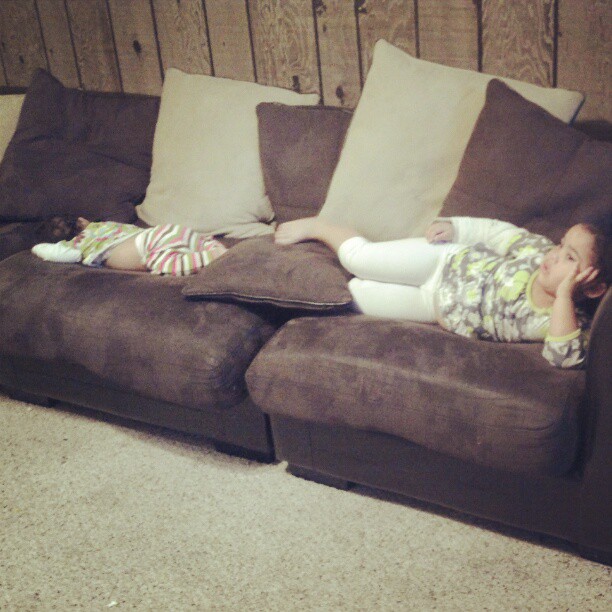
But it was so worth it! Alaya is my personal model to show how much more livable the living room is after an airy paint job!


It seems that after all the items I have built, that I would be some sort of professional, but I'm not. I am a procrastinator and a little really lazy. I always have all these plans and things I need to do, but I rather just sit around and play with the kids or watch some Netflix. I try to get up and do things that make me feel complete, so I needed some end tables to put my glass of sweet tea so I asked for lumber for Mother's Day. My husband, Jonathan, has refused lumber as a gift for a year or two now, but he has finally given in and let me have what I want.  So I started on some Truss End Tables, with a couple of changes I made along the way.

I was so proud of these two, they were simple and so pretty. It took me a couple hours to put them together.


The Rustoleum Kona stain made them even better and the poly made them shine. I was so excited that soon as they were dry I ran one, well slowly waddled because it was heavy, to the house to see what it looked like!

Then I remembered the thing called a measuring tape. I had measured how long I wanted the table to be but forgot about the height and how short my couch was. Enter the mind cursing one more time! I am always distracted and in a rush to get something done that I screw it all up! So, I put them back in my shed and let them set there for an hour while I cooled off.
 I later went to the shed, ripped them apart (the glue destroyed them a bit) and then started cutting down and redoing everything! And BAM! I got it to fit perfectly. I didn't put the trusses back on because I couldn't get them to work right, but I love it like this. Alaya and Shila are known to hide under there and at some point I want to put trays under there as a shelf. Do you like my walls? I'll post on those also.


Wednesday, July 17, 2013

When we bought our first house one of our first purchases was a sectional that did not hold up well to my jumping kids. They ripped the cushions at the seams by sliding down them onto the seats. Mason was known to walk across the back and then use the "slide" in certain spots, so the ripping happened in two different locations. Luckily the warranty covered it and we were able to pick out a new sectional. I don't know why I went with a new sectional, because I didn't like the sectional in our small living room anyways. This time I decided to get an OTTOMAN! I guess I wasn't thinking about all the jumping and bucking that happens in our house, because I would have known to not get an ottoman with my kids in the house. So our new couch was destroyed, it began to sag in a couple years due to the newly added trampoline. It was also stained and just plain icky. I hated when people sat down and seemed to just fall into the couch.

So we got a new one, one with a sofa bed so when our family comes down we have an extra place for guests.

The bed also makes up for the fact that Mimi and Pawpaw live with us when they are not in Illinois, so sleepovers happen via the living room! They bed to sleep there nightly.


 With a new couch, I needed a new coffee table and I'm not known to buy anything that I can make. So like any normal diy-er wanting to build a coffee table, I went to Ana-white.com and found  The Rustic X Coffee Table. I had actually been eyeing it for a while, but finally decided to take it on. 

It started off easy enough, a simple frame and I was on a roll!


Then I made it to the X and I was stuck... really stuck. I got this piece to work after a lot of mess ups and I couldn't get the other piece to look straight. I had so many cuss words I wanted to say, but Shila kept me in check. So I sat there and sat there and looked at other people's beautiful X tables and then tried more pieces of wood. 


Then like a miracle out of no where, The Triple Truss Coffee Table was posted during my mini melt down. It was like a calling from the diy gods, I was meant to make a simpler version of the table.  


It is nice, I know. I love it so much! Of course I had to stain and poly it. So I used a Rust-oleum stain in Kona. I ended up using a q-tip to get the stain down into the pocket holes. I had to stain inside because I have the 3 kiddos and I pushed being outside a little too much.


And here it is, the finished project! Along with a sneak peak at the end tables I made later on.


Friday, May 3, 2013

So I'm not much of a planner and not very organized, in other words I am random. I had been trying to figure out Shila's curtain situation for a little while and was going to end up just going white sheers to give it a clean look, but sometimes I find better things. So in a random shopping spree my mom talked me into going to JcPenney before a doctor's appointment and I found what I had been looking for.


CAKE! Okay so cake was the start of the good trip, but I found something better since the cake was a little too sugary for my taste, but not Shila's taste.


This shower curtain contained all the colors I wanted to add to Shila's room and had a fun hand drawn look to it, and there were two of them! Even better...


Clearance prices always make me smile and I was all grins knowing I could cover 2 windows for 10 bucks! So as my mom stared at me like I was crazy, I don't get my resourceful decorating skills from my mother, I purchased both shower curtains and took them home.

The next part was incredibly simple that even a crappy sewer could do it, me being the crapper sewer that is.  Since it was nicely folded by the factory I was able to find the center of the curtain easily and just used the already pressed fold to cut it into the two curtains.   Then hemmed the cut edges. Then with some spare ribbon I had left over from Shila's Rapunzel birthday party, I tied up the curtains.


And might I say, I LOVE THEM!